Hidden
Hidden
Hidden
Hidden
Hidden
Hidden
Hidden
i4xx INSTALLATION GUIDE
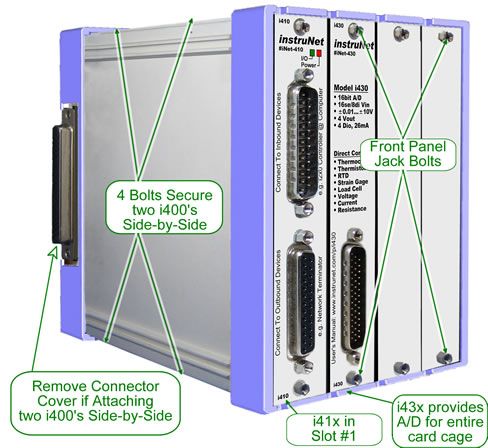
How to Install i4xx Cards into i4xx Card Cage The following diagram summarizes how to install the 4xx Card Cage:
Before setting up your i4xx Card Cage System, please read the following: In summary:
To install an i4xx Card into a Card Cage:
To remove i4xx Card from i400 Card Cage:
How to bolt together i400's side-by-side to form a ≥ 5 slot card cage Before assembling 4 slot i400's side-by-side, please read the following: In summary:
To bolt together multiple i400's to form a card cage with ≥ 5 slots:
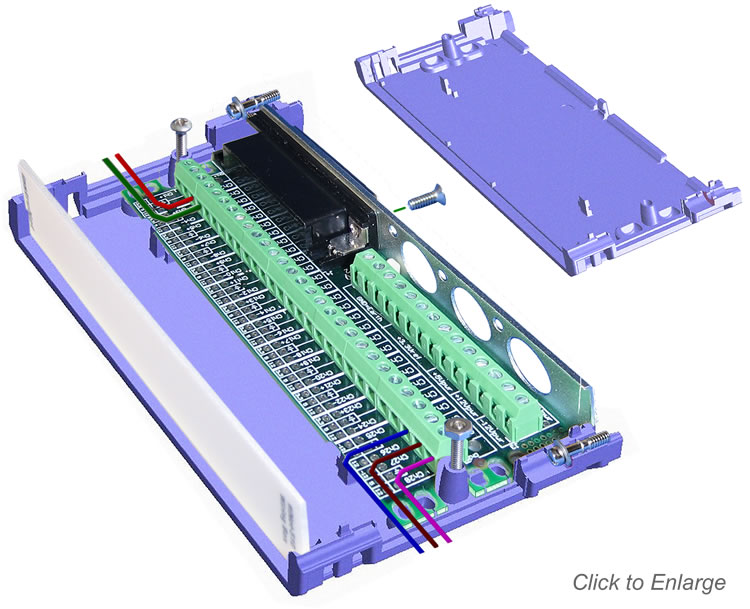
How to Assemble & Install i51x Wiring Box
How to Verify Your System is Working Properly Verify that your hardware and software is working in 5 easy steps:
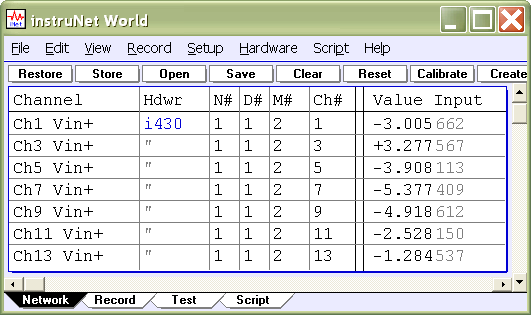
1. Run the "instruNet World" application program (i.e. file "instruNet World Win32.exe), in the instruNet directory. A window will open, similar to what is pictured to the right. If necessary, you might need to click on the Network tab at the bottom of the window to select the Network page. If this window opens, then you know your instruNet driver file is installed and working correctly. The list of channels shown in the window's table will vary, depending on what instruNet hardware is connected. If an error alert appears, please click here.
instruNet HARDWARE SEARCH RESULTS: If this does not match what you believe is installed on your network, then check your hardware installation (cables, power, etc). Also, it is possible that the instruNet Driver is older than the devices on your network, which means you need the latest driver that recognizes these new devices. The instruNet Driver is always listed as the 2nd installed item.
3. Press the Test button at the top of the Test page to test your controllers and devices, and to report any problems if found. The duration of the test can vary from 1 to 100 seconds depending on the size of the networks, and the speed of the computer. If no problems are found, a report similar to the one below is printed in the window: INSTRUNET QUICK TEST RESULTS: 4. Press the Big Test button to run an exhaustive test. An alert similar to the one below will appear to communicate that the computer will test all instruNet hardware until there is an error, or until you press the mouse button down to stop the test.
It will test your network(s) all night long if you let it. Press OK to begin the Big Test. Wait 20 seconds or longer. If an error occurs while testing, an alert will appear and the error message will also be printed in the window. If this occurs, please see Troubleshooting. If no error alerts appear, and you want to stop the test, press the mouse button down and hold it down until the an alert appears announcing the end of the test. Click OK to exit this alert. The test results are printed in the window, in a format similar to what is shown below: We ran 2.1 million tests and did NOT hit 1 error. Big Test is identical to Test, except it runs for a longer period of time and is useful at finding intermittent problems that only occur once every minute, hour, or day. Big Test can be run overnight for extensive testing of all hardware. 5. You are done! Your instruNet hardware and software is installed correctly and running beautifully. Please proceed to the Tutorial to learn more. Enabling the instruNet World+ (PLUS) License For information on how to purchase iW+, click please click here. To install an iW+ license on your computer and enable its powerful features on Windows Xp/Vs/7/8/10 computers, please click here.
|
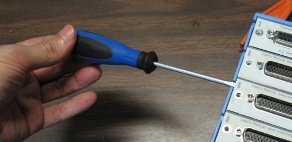
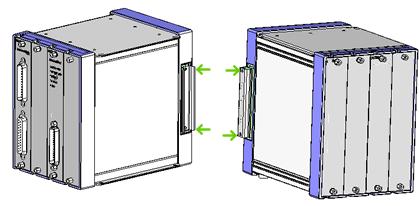 On the left side i400, remove the right-side Hd62 connector cover and on the right side i400, remove the
left-side Hd62 connector cover. Each cover is held in place with two
On the left side i400, remove the right-side Hd62 connector cover and on the right side i400, remove the
left-side Hd62 connector cover. Each cover is held in place with two
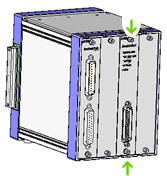
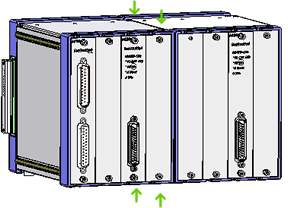 Press the i400's together and make sure the two Hd62 connectors fit snuggly by pushing the 2 units together with moderate force. Secure the assembly with four